String truncation as a service
Recently I bought a new Lexmark printer. I’m not sure why I decided to subject myself to the torture of being a printer-owner. Maybe it was because the library is closed due to COVID-19 and I have nowhere to print anymore. Maybe it was because I wanted to make an irresponsible purchase. Maybe it was because I felt the world needed a little more suffering in it.
I decided that if I was getting a nice printer, I was going to get a good one. One with toner instead of ink. One that could make copies. One that had SNMP support. One that would hopefully last more than 100 pages. I’ve confirmed that at least all three of those are true. I also found that the Lexmark MC3224dwe (and likely many other Lexmark printers) come with a very fun, undocumented feature: a string truncation service.
One of the features of the MC3224dwe is the ability to scan to email. The manual for the printer has very helpful instructions for configuring the SMTP settings on the device:
From the E-mail Setup section, configure the settings.
When setting this up, I decided that since the printer is shared by myself and roommates, the best thing to do would probably be to not have the emails come from my personal Gmail and that I should instead set up SendGrid or SES to configure the emails. For some reason, the printer was completely unable to authenticate to either of these services, despite me confirming on other tools that the credentials were absolutely functional.
As it turns out, Lexmark truncates the password you enter into the SMTP settings to 31 characters. This isn’t documented anywhere that I’ve seen. And rather than boring you with the process of how I discovered this, we’ll go over how to use it to our advantage and you’ll pick up a bit of my troubleshooting path along the way.
This is shorter than any possible credential that could be used for AWS SES. The credentials that I’ve generated through their Console wizard have been 44 characters. The SendGrid credentials that I’ve generally gotten have always been 69 characters but I haven’t seen this documented.
To verify that this would be an issue, I fired up my Python interpreter and ran a few quick tests.
>>> 69 > 31
True
>>> 44 > 31
True
To follow along with building our new string truncation service, you’ll need
- A Lexmark MC3224dwe (or any of their other broken models, which may be all of them)
- Python 3.5+
To really turn this into a string truncation service (and get our truncated strings), we’ll need to spin up a super minimal SMTP server that absolutely does not come close to complying with any RFC.
We can use Python’s asyncio module to build our server. And we’ll use
click to give it a friendly
CLI.
Upon connecting, the Lexmark printer will send an EHLO and then it will always
try to AUTH LOGIN (even if you tell it you only support PLAIN). At the end
it will send a QUIT message. The functions to handle these functions will be
registered using a simple decorator:
handlers = {}

def register_handler(name):
    def decorated(func):
        handlers[name] = func
        def wrapped(*args, **kwargs):
            return func(*args, **kwargs)
        return wrapped
    return decorated
All of our handlers will be decorated with this, and they’ll pass the SMTP
command that they handle. Each will accept 3 arguments, the StreamReader and
StreamWriter that we get from the asyncio server, and a variable args that
contains the arguments passed to the SMTP command. They’ll return True if the
connection should continue and False if it shouldn’t.
The easiest of the commands to implement is QUIT. It just returns False.
@register_handler('QUIT')
async def handle_quit(reader, writer, args):
    return False
Our EHLO handler is extremely simple. It basically just needs to tell the
client that AUTH LOGIN PLAIN is a support extension. We will not implement
support for HELO since that’d be useless (we wouldn’t get a string to truncate).
@register_handler('EHLO')
async def handle_ehlo(reader, writer, args):
    message = [
        "250-truncate\n",
        "250 AUTH LOGIN PLAIN\n",
    ]
    message = [m.encode() for m in message]
    writer.writelines(message)
    await writer.drain()
    return True
The AUTH method can be either PLAIN or LOGIN. If the Lexmark printer does
a PLAIN auth, it will pass the credentials as an argument; however, support for
prompting is fairly trivial. Adding support for LOGIN is as well (especially if
we do it lazily), so we can throw that in. There are a lot of calls to
bytes.decode to turn the bytes we get from the stream into strings that
Python 3 will be a bit happier interacting with.
The implementation of AUTH is a little longer, but overall not awful. It handles
the various authentication methods that are supported and once the password is
found, it prints it out. It always pretends that the password invalid because we
really don’t want the printer to try and send an email since that’s not supported
(because again, we’re writing a really terrible SMTP server).
import base64

@register_handler('AUTH')
async def handle_auth(reader, writer, args):
    if (not args) or (args[0] not in ('PLAIN', 'LOGIN')):
        writer.write("500 Only LOGIN/PLAIN are supported".encode())
        await writer.drain()

    method = args[0]

    if method == 'PLAIN':
        args.pop(0)
        if args:
            b64_creds = args[0]
        else:
            writer.write('334 '.encode())
            await writer.drain()
            b64_creds = (await reader.readline()).decode()

        creds = base64.b64decode(b64_creds).decode()
        _, _username, password, = creds.split('\0')
    elif method == 'LOGIN':
        # Prompt for the username
        # "Username:" -> VXNlcm5hbWU6
        writer.write('334 VXNlcm5hbWU6\n'.encode())
        await writer.drain()
        _username = (await reader.readline()).decode()
        # Prompt for the passworkd
        # "Password:" -> UGFzc3dvcmQ6
        writer.write('334 UGFzc3dvcmQ6\n'.encode())
        await writer.drain()
        b64_pass = (await reader.readline()).decode()
        password = base64.b64decode(b64_pass).decode()

    print(password)

    writer.write("535 Authentication credentials invalid\n".encode())
    await writer.drain()

    return True
Next, we’ll want a function to parse the commands the client sends and dispatch
them to the handlers. It’ll accept the reader and writer that we got from the
asyncio server and like the other handlers, it’ll return whether or not the
connection should stay open.
async def handle_command(reader, writer):
    data = await reader.readline()
    message = data.decode()
    if not message:
        return False
    if message.endswith('\n'):
        message = message[:-1]
    command, *args = message.split()
    if command in handlers:
        return await handlers[command](reader, writer, args)
    else:
        writer.write(f'500 Error: command "{command}" not recognized\n'.encode())
        await writer.drain()
    return True
A function to open the connection and run our command handler in a loop will be
useful. The function will also handle closing the connection once
handle_command has returned False.
async def handle_connection(reader, writer):
    writer.write('220 String truncation service\n'.encode())
    await writer.drain()
    while await handle_command(reader, writer):
        pass

    writer.close()
Finally, we’ll want a function that will start our server as well as a main
function with click decorators to support various CLI arguments.
import asyncio
import click

async def server_func(host, port):
    server = await asyncio.start_server(handle_connection, host, port)
    async with server:
        await server.serve_forever()


@click.command()
@click.option(
    '--host',
    help="The address to listen on",
    default="127.0.0.1",
)
@click.option(
    '--port',
    help="The port to listen on",
    type=click.INT,
    default=8025,
)
def main(host, port):
    asyncio.run(server_func(host, port))


if __name__ == '__main__':
    main()
So once you put it together you end up with a script you can execute by running
./server.py --host 0.0.0.0 --port 8025
which will listen on all interfaces on port 8025 for requests. Once it receives a login attempt, it will just print out the passwords.
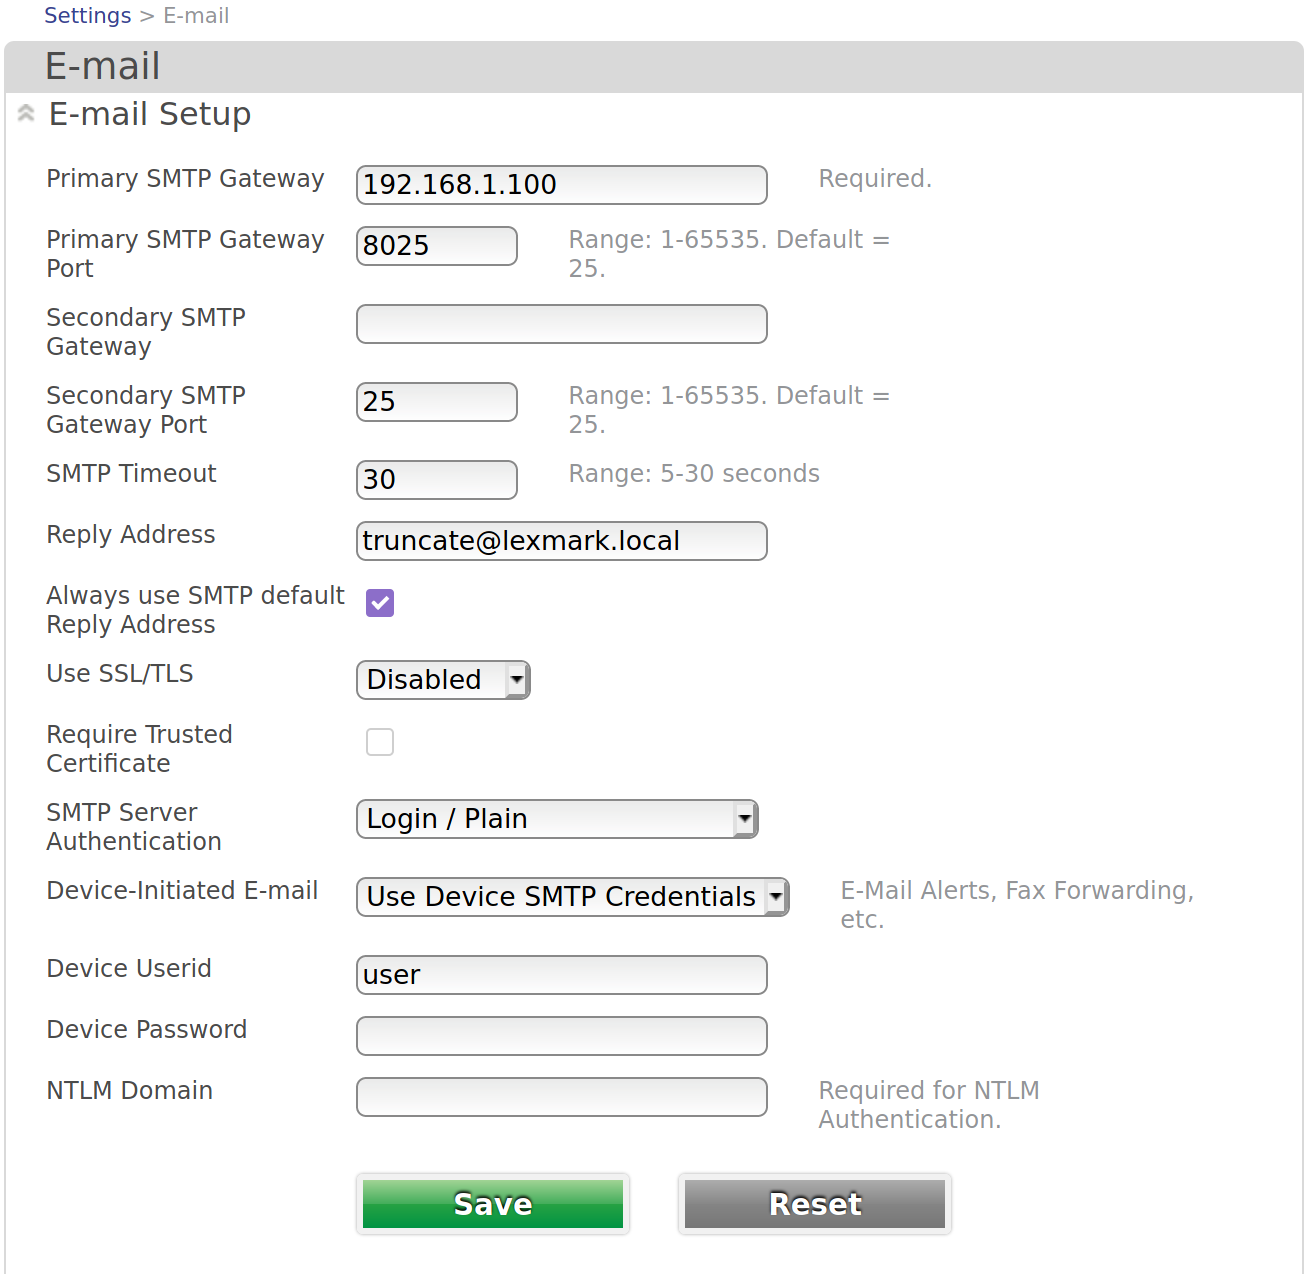
With the server in place and running, the only thing left is to configure the Lexmark printer to send the truncated strings somewhere. This ends up proving to be fairly trivial. Just browse to the printer’s web interface and click “E-mail” in the navigation bar on the right (I learned this from that very helpful manual that was linked to earlier). The primary SMTP gateway will be the IP address of the machine that the server is listening on. Do not use SSL/TLS as our server does not support that. Only send non-sensitive strings to truncate.
The “Device Userid” needs to be specified, but it can be any value. Our server completely ignores it. The “Device Password’ is the field that gets truncated, so put you’re string there and hit “Save”.
On the printer (or using the remote operator panel), go to “E-mail”, tap the “To:” field and enter any email addres. Press “Add” and “Done”. Now you’re ready to have the printer send your truncated string to the server. Pressing start will have the printer initiate the SMTP connection and the truncated string should be in the standard ouput on the console.
For example, if you put “WHY THE HELL DOES LEXMARK TRUNCATE PASSWORDS” into the “Device Password” field, you’ll see

In the end, I am disappointed that my printer can’t really send emails using the services I’d like to use, but I do appreciate my ability to send truncated strings across my network to any device with just a bit of configuration.
The script probably could use a bit of work. It doesn’t set timeouts and implementing STARTTLS support really would be the icing on top of the cake for taking this just enough past too far. You’ll want to be careful doing this too much unless you turn off printing reports on the printer. This can be done in Settings > E-mail > E-mail Defaults > Admin Controls and flipping “Transmission Log” to “Do Not Print Log”.